Introduction Want to dive into basic electronics? A two-blinking-LED circuit is a great place to start! This simple yet fun project will help you understand how transistors work in a switching circuit and give you a hands-on introduction to oscillators. Whether you're a beginner or just looking for a quick electronics experiment, this guide will walk you through building your own two-blinking-LED circuit using C828 transistors.
Materials Needed:
-
2 LEDs (any color)
-
2 Resistors (330Ω for LEDs, 10kΩ for transistor base)
-
2 C828 Transistors
-
2 Capacitors (10µF, 16V or higher)
-
1 Breadboard
-
1 9V Battery (or 5V power supply)
-
1 Battery Clip or Power Source
-
Jumper Wires
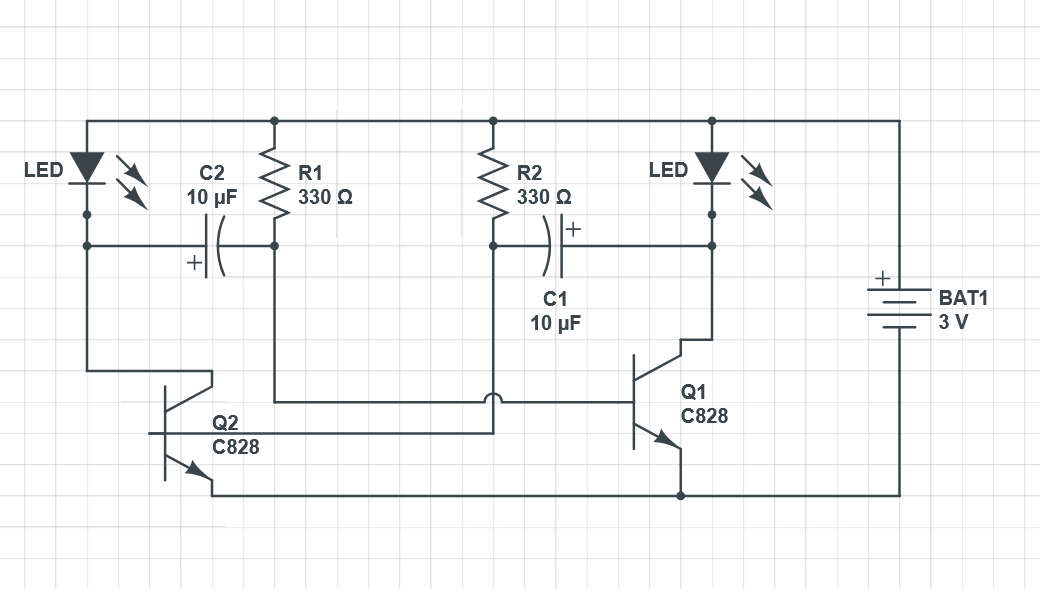
Circuit Diagram:

Step-by-Step Guide:
-
Place the LEDs and Transistors on the Breadboard
-
Insert the two LEDs onto the breadboard, ensuring that the longer leg (anode) is aligned with the positive rail.
-
Place the C828 transistors so that the collector connects to the LEDs, the emitter goes to ground, and the base connects to a capacitor.
-
-
Add Resistors and Capacitors
-
Connect a 330Ω resistor between each LED’s anode and the power rail.
-
Connect 10kΩ resistors between each transistor's base and ground.
-
Insert 10µF capacitors between the base of one transistor and the collector of the other.
-
-
Connect the Power Source
-
Attach the positive terminal of the battery (or power supply) to the power rail.
-
Connect the negative terminal to the ground rail.
-
-
Testing the Circuit
-
When powered on, the LEDs should blink alternately in a continuous cycle.
-
How It Works
-
The C828 transistors act as switches, creating an astable multivibrator.
-
The capacitors and resistors determine the switching frequency.
-
When one transistor is on, the other is off, causing the LEDs to blink alternately.
Fun Variations to Try
-
Use different capacitor values to adjust the blinking speed.
-
Experiment with different resistor values to tweak the timing.
-
Add a potentiometer to dynamically control the blink rate.
Conclusion This simple two-blinking-LED circuit is a great way to get started with transistors and oscillators. It’s easy to build, helps you understand switching circuits, and opens the door to more complex projects. Happy tinkering!